

How to Use a Fishing Bobber
In this page, we'll go over the standard ways you can set up your typical push-button fishing bobber and a slip bobber.
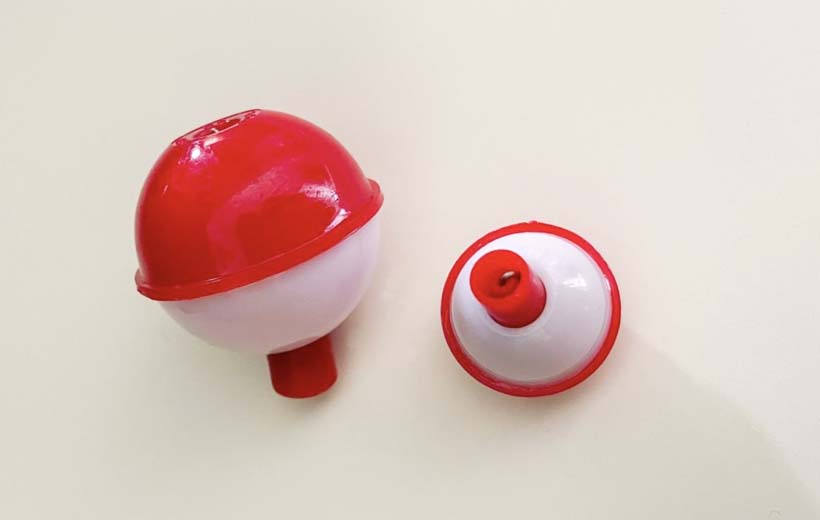
Push-Button Bobber Setup
Step 1: First you need to decide how far from the surface of the water you want your bait to hang.
Step 2: When looking at this bobber, you’re going to see a little push button on the top. Inside this button, you’ll notice a little metal bar. Push down both the plastic button and bar together. When you do this, you will see another bar pop out of the bottom of the bobber.
Step 3: At the depth you’ve already determined, wrap your line around that bar one full rotation (securing it on your line), then let go of the button.
Step 4: Place your thumb over the metal bar that you just attached to your line.
Step 5: Push down on the plastic part of the button with your index and middle finger, so the metal bar on the top of the bobber can pop out as well.
Step 6: Now wrap your line around that bar (one full rotation), then let go - and voila!
Note: Because these bobbers clip onto your line and stay in place, you are limited to how deep you can set your bait and how much you can reel in your line. This leads us towards a second bobber option..
Slip Bobbers
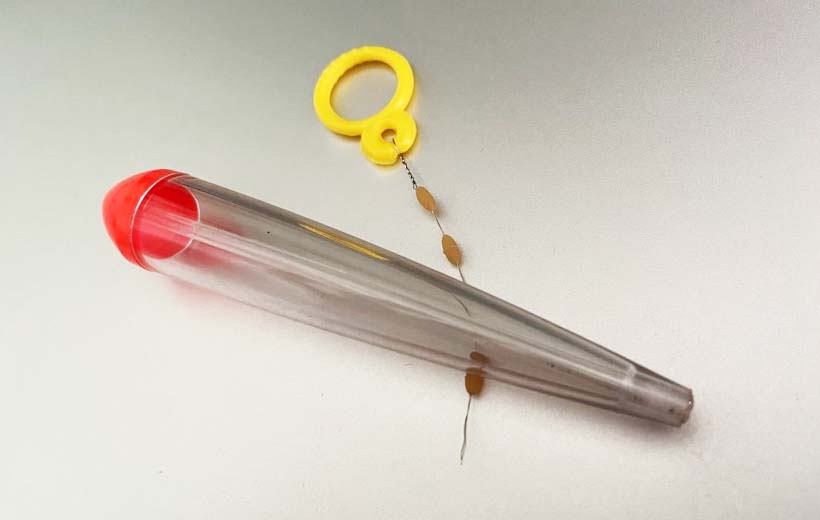
These bobbers come with a bobber and a bobber stop (and sometimes a plastic bead), which is simply a string wrapped around a plastic tube. Setting it up on your line is much easier than you may think.
Before we get started, figure out the desired depth you want your bait to hang in the water. Tip: A good place to start is by setting up your bait 1 to 2 feet from the bottom.
How to find the bottom
Step 1: Put some weight on your line; this is where your bigger split shots come handy. Make sure you can feel the weight through your rod and reel.
Step 2: Drop your weight into the water.
Step 3: Keep an eye on your line as it falls.
Step 4: Drop your weight into the water.
Step 4: When it looks like your line has stopped falling, your weight has now reached bottom.
Step 5: Try to feel the bottom with your weight by lifting it up and down. This is so you know exactly where the bottom is.
Step 6: Lift up your line so your weight is 1 to 2 feet off of the bottom.
Step 7: Put a small split shot on your line at this mark.
Step 8: Pull up all of your line with your hands and take off the weight(s) you used to find bottom. All you should have in your hand is the tag end of your fishing line.
Note: This is just one way of setting your depth for the slip bobber.
Slip Bobber Setup
Step 1: When looking at this bobber, you’ll see a little push button on the top. Inside this button, you’ll notice a small metal bar. Push down both the plastic button and bar together. When you do this, another bar will pop out of the bottom of the bobber.
Step 2: While holding onto the tube, slide the string off the tube onto your line.
Step 3: Pull the two tag ends of the bobber stop string tightly to your fishing line, and then cut them off as close to the knot as you can.
Step 4: Make sure you throw the tube into the garbage.
Step 5: Grab the bead and slide it onto your fishing line, followed by the bobber.
Step 6: Tie a hook onto the end of your line, and now your slip bobber rig is ready to go.
Note: When out of the water, your bobber and bead will sit on top of your hook, allowing you to cast and reel in as far as you want without disturbing your bobber placement. Once your bobber’s in the water, with the bead it will float up to where your bobber stop is. As you reel your line in, the bead and bobber will slide down the line back towards your hook. Your bobber stop will go through the rod guides and onto the spool of your reel with very little hassle. At any time, you can adjust the depth your bait will be hanging at by simply sliding the bobber stop up or down your fishing line.